A Fall Treat: Spaghetti Squash with Herb Butter

Bright yellow, orange and red leaves swirl around us this time of year.  It is also close to Halloween and Trick-or-Treaters are busy getting their costumes ready.  Many memories of childhood come to mind — dressing up as a lion made out of a large paper bag with orange and brown paint to create my lioness face and mane.  Walking hand-in-hand with my brother and sister through the neighborhood hoping to collect a mountain of candy.

The following recipe is a truly a worthwhile treat to make, and it’s easy. Squash of all colors is in season, just waiting to be baked, steamed, creamed and transformed into something simple, and delicious.  A favorite of ours is Spaghetti Squash.    This beauty contains many nutrients, including Vitamin A, beta-carotene, folic acid, and potassium.  It is also low in calories and makes a fun substitute for pasta, making it ripe for similar sauces that we normally cook for pasta.  The recipe below is very simple, and was enjoyed by all today at lunch.

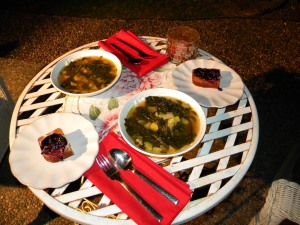
Spaghetti Squash with herb butter and tomato-basil sauce.

Ingredients:  One Whole Spaghetti Squash, 1 stick of unsalted butter, 1/3 cup chopped fresh parsley and oregano, 3 large cloves garlic finely minced, salt and pepper to taste.

Recipe:  Preheat oven to 375 F.  Wash outside of squash and pat dry.  Carefully cut ends off, then stand on straight end and cut in-half lengthwise (you need a large, sharp knife).  Scrape out seeds (you can roast these just like pumpkin seeds).  Place on large cookie sheet and place with rind side up, then add 1/2 cup of water.  Cook until tender, about 45 to 50 minutes depending on the size of the squash.  All to cool enough to handle.  Use a fork to separate the strands by scraping side to side.   Place butter in large, deep sauce pan and slowly melt.  Add garlic and simmer until garlic is fragrant (do not brown).  Turn off heat and add fresh herbs.  Add in Spaghetti squash and gently toss in with herb butter.  Salt and pepper to taste.  Serve with grated Parmesan cheese and/or your favorite marinara sauce.

Smoky Shredded Pork Tacos

Thanksgiving is almost here and with that comes a desire to spend more time in the kitchen. My in-laws, Linda and Travis just got into town yesterday and we wanted a special meal to welcome them. I turned to one of my favorite cookbooks; Rick Bayless’s Mexican Kitchen. Rick’s cooking show on PBS was my first introduction to his talents. I believe that a meal should have a story and Rick does an outstanding job of weaving in the story of each dish.
He writes in his cookbook:
“This dish, also known as Tacos de Picadillo Oaxaqueno has the texture of a hand-chopped or shredded pork with the smoky sting of the chipotle. The picadillo you find in Veracruz and Oaxaca where smoky chile pasilla oaxaquena is the standard. Though this fillings name derives from picar (to chop), I’ve chosen a boiled and shredded version here. The hint of sweet and spice is very appealing, very comfortable.”

The sweetness and texture of the pork with the smoky flavor of the chipotle and the subtle hint of the toasted almonds are part of what sets this dish apart.

We served on warm corn and flour tortillas, added some lettuce, fresh tomato and a classic refried black bean also from Rick’s Mexican Kitchen cookbook.

Smoky Shredded Pork Tacos
From Rick Bayless’s Mexican Kitchen…
By Rick Bayless

1 ½ lb boneless pork shoulder, trimmed of fat and cut into 2-inch cubes
5 garlic cloves, unpeeled
1 large white onion, diced

Quick-cooked Tomato Chipotle Sauce
7-8 plum tomatoes
2-3 canned chipotles in adobo
2 ½ Tbs vegetable oil
Salt

½ tsp cinnamon, preferably Mexican canela
¼ tsp fresh ground black pepper
1/8 tsp ground cloves
½ c raisins
½ c slivered almonds
16-18 corn tortillas (plus extras in case some break)
Hot sauce (optional)

In a medium-sized sauce pan, cover meat with heavily salted water. Peel and roughly chop 2 cloves of the garlic and add to the pan, along with half the onion. Bring to a gentle boil. Skim off any grayish foam that rises during the first few minutes. Partially cover and simmer over medium-low heat until thoroughly tender, about 1 ½ hours.

If time permits, cool the meat in the broth. Shred it with two forks.

For the sauce:
Heat a heavy skillet and roast the remaining 3 cloves of unpeeled garlic until soft, turning occasionally (about 15 minutes). Cool and peel. Roast the tomatoes on a baking sheet under a very hot broiler until blackened on one side, about 6 minutes. Flip and roast the other side. Cool, then peel, collecting all the juices with the tomatoes.

In a blender, pulse the tomatoes, garlic, and chiles to a medium-fine puree. Heat 1 Tbs of oil in a heavy sauce pan over medium-high heat. Add the puree and stir for about 5 minutes as it sears and thickens. Season with salt.

For the meat:
In a large non-stick skillet, heat the remaining 1 ½ Tbs of oil over medium-high heat. Add the shredded pork and remaining half an onion. Fry, stirring and scraping up the browned bits, until the mixture is crispy and golden, about 12-14 minutes.

Sprinkle the cinnamon, pepper, cloves, and raisins over the meat. Pour on the tomato-chipotle sauce. Reduce heat to medium and simmer, stirring occasionally, until nearly all the liquid has evaporated, 4-5 minutes.

Turn on the oven to 350 degrees. Toast the almonds in a small baking pan until fragrant and lightly browned. Watch carefully so they don’t burn. Stir them into the meat mixture. Taste and season with more salt if necessary.

Assembling the tacos:
Steam the tortillas in a steamer or in a microwave between damp paper towels. Scoop a couple of heaping tablespoons of filling into each warm tortilla and fold over. Add hot sauce if desired.

Seashore Supper

Barbecued Oysters with Homemade Sauce

We enjoyed an amazing day at the Point Reyes National Seashore. It was a gorgeous September afternoon — complete with ocean breezes, fog, and the park’s famous heard of Tule Elk. We began our day with a 4 mile hike, starting at the historic Pierce Point dairy farm and ending it with a meal of delicious barbecued oysters from the nearby Drakes Bay Oyster Company. The old Pierce dairy ranch is a reminder of this region’s rich farming heritage from the late 19th century, when nearly 1,000 dairy farms were operating in Marin County.

Fresh Oysters at Drakes Bay Oysters

Connecting us to farmers today, our visit to The Drakes Bay Oyster Company was a joy as we sampled oysters on the half-shell while selecting a dozen to take home for barbecuing. The Lunny family runs the oyster farm and their historic ranch nearby. The Lunny family is in its fourth generation as a family run farm, raising grass-fed organic beef cattle. They are a terrific example of some of the innovative farmers in northern California, constantly looking for better ways to be sustainable as they grow healthy sources of protein. We can’t wait to go back for more oysters, and another hike in one of the most beautiful and special places on the planet.

Barbecuing Oysters and Sausages


BBQ Oysters
Makes 1 dozen oysters

Keep fresh oysters in their shells and in a bucket of crushed ice (or in the refrigerator). Scrub and wash oysters thoroughly. Pre-heat your grill (to about 375). Place oysters on their bottoms, onto hot grill and close lid. Cook about 6 to 8 minutes. Oysters will open just slightly. Remove oysters to sturdy tray, and carefully pry open with a good pairing knife. Take top shells off. Place oysters on a serving tray, douse each one with a generous amount of barbecue sauce and serve with slices of lemon and french bread.

Barbecue Sauce
1 six ounce can organic tomato paste
12 oz water
2 to 3 tablespoons apple cider vinegar (depending on your taste)
juice of one lemon
4 or 5 good shakes of Tapatio sauce (or your favorite Tobasco sauce), to taste
healthy pinch of salt and pepper (about 1/2 teaspoon each)
1 to 2 Tablespoons brown sugar (depending on how sweet you like your BBQ sauce)
1 to 2 Tablespoons of Angelo’s Magic Italian BBQ Spices (or your favorite dry BBQ spice mix)

Mix all of the ingredients with a whisk in a small saucepan (use a non-reactive metal like stainless steel or glass saucepan). Heat on medium until bubbling, and turn to low and simmer for about 8 – 10 minutes. Turn off heat and let stand for another 10 – 15 minutes.

Polenta: A Winter Supper

A winter supper: polenta with tomato sauce and Italian sausage.


The charming town of Petaluma is surrounded by the history of Italian ancestors – farmers and ranchers who raised the food that fueled the growth of San Francisco and the North Bay in the late 1900s. Third and fourth generation growers and ranchers continue this tradition today, and many have been able to sustain their heritage through the community actions of MALT and the Sonoma Land Trust. This recipe makes me think of their history, and it is a favorite dish. It’s simple, and yummy. My two requisites.

Polenta

Ingredients:
6 cups water
2 teaspoons salt
2 cups polenta
2 tablespoons butter (optional)
Shredded Parmesan cheese (optional)

Add salt to water in medium pot and bring to a low boil. Slowly stir in polenta, turn heat down to a simmer. Simmer for about 20 to 25 minutes, stirring frequently. The polenta should bubble gently – you don’t want the bottom to burn. You can’t over stir this recipe, so relax, listen to some music and in the meantime brown the sausages.

After the polenta has finished cooking through, stir in the butter (optional, but very good). Top with shredded Parmesan when you serve this creamy dish – I often serve it with goat cheese crumbled or Chèvre spread on top. You can also serve the polenta with tomato-basil-garlic sauce, or your favorite pasta sauce. I like to serve Polenta with Italian sausage. (See recipes below.)

You have a choice of how to serve the polenta: Creamy or browned. I usually serve it creamy and then place what is left over in a bowl or storage container and place it in the ‘fridge. I take it out later, cut it when it’s cold, and brown it in olive oil as a delicious “left-over.”

Italian Sausage

Buy your favorite Italian sausage – Mild or Hot. These are uncooked sausages, therefore you need to properly heat them through as you cook them and brown them. To serve 4, place 4 sausages in a deep sauté pan with a lid with ¼ to ½ cup of water. Poke each sausage, 2 to 3 times, with a knife. At medium-high heat, bring the sausages and water to a good simmer, then lower to low-medium heat and cover for 10 minutes. Add water if needed as the sausages cook through. Take the lid off and brown both sides on medium heat.

Tomato-Garlic-Basil Sauce

This quick sauce goes with almost anything!

Ingredients:
1 small can stewed tomatoes
1 large garlic clove, crushed and finely minced
½ tablespoon olive oil
1 teaspoon dried Basil

In a small saucepan, sauté the garlic in olive oil until just golden. Add stewed tomatoes with juice and crush tomatoes with a “potato masher” in the pan. Simmer 5 minutes. Add dried Basil and simmer 5 minutes. Voila . . . it’s ready.

Passion Pecan Cookies

Passion Pecan Cookies

Passion Pecan Cookies with My Nepenthe cookbook opened in the background.

These melt-in-your-mouth cookies are slightly adapted from a recipe out of a favorite cookbook: My Nepenthe ~ Bohemian Tales of Food, Family, and Big Sur. For those of us who love pecan pie, this cookie is a kindred spirit. The original recipe uses coconut, and is titled Passion Cookies in the book. The author, Romney Steele, explains that Richard Burton often requested these cookies during his visits to Nepenthe’s gorgeous restaurant on the coast of Big Sur.

The triple layers in these cookies make it fun to create, and they are easy to serve as a “finger food’ dessert. They are SO GOOD – you truly have to make them to find out! Hmmm . . . I think it’s time to make a second batch.

Ingredients

CRUST
1 ½ sticks of unsalted butter, room temperature
3 tablespoons granulated sugar
3 cups unbleached all-purpose flour

FILLING
2 cups packed brown sugar
3 eggs
3 tablespoons all-purpose flour
¾ teaspoon baking powder
1 tablespoon pure vanilla extract
1 ½ cups chopped pecans

TOPPING
1 stick unsalted butter, room temperature
1 ½ cups confectioner’s sugar
2 teaspoons pure vanilla extract
About 20 pecan halves (optional)

Recipe

Preheat oven to 350°F. Generously grease a 9 x 13 inch baking pan.
Use the paddle attachment in an electric mixer (or mix with a wooden spoon in a large mixing bowl) and beat the butter and sugar until creamy. Stir in the flour slowly just until fully combined and it looks like coarse corn meal. Pour into greased pan and press firmly and evenly. Bake for 20 minutes until lightly golden. Rinse out mixing bowl for the next step.

For the filling, use the paddle attachment* to cream the brown sugar and eggs. Add the vanilla. In a separate bowl, mix the flour with the baking soda then add it to the sugar and egg mixture until just combined. Slowly mix in the pecans. Pour the filling over the still-warm crust and spread evenly. Return to the oven for 20 minutes. Cool in the pan on a rack.

For the icing, place the butter in the mixing bowl and sift the powdered sugar (confectioner’s sugar) into it. Mix well with paddle attachment and add vanilla. Mix until smooth. Use a little milk or half-and-half to thin if needed – but just a little! The icing needs to be soft enough to spread, but not so soft that it droops and won’t set. Spread over the cookies and cut into small squares. Top each cookie with a pecan half.

*A wooden spoon and large mixing bowl works just as well.

Photo taken by grimmts and featured on IgoUgo.

Kel’s Grass-fed Meatloaf

Kel’s Grass-fed Meatloaf

Meatloaf is a favorite of ours, and it’s so easy to make, we wonder why we don’t enjoy it more often. We were inspired by the high quality ground beef that we purchased from Joy Dolcini — a 4th generation cattle rancher in Sonoma County. We were surprised at their affordable pricing, and happy to go “in” on the purchase with two other families. Knowing where and how our beef is raised has made a big difference in our choice to eat beef. Grass-fed beef is much healthier than the corn-fed beef raised by the large, corporate cattle lots, because it is lower in saturated fat and higher in omega-3 fats. After all, cows are naturally meant to eat grass, not corn. Healthier cows, make healthier beef.

It’s been a cold, December day. Gray and chilly. We brightened at the sight and smell of tonight’s meatloaf and mashed potatoes, and left the dinner table warmed and nourished.

Ingredients

2 eggs
2 lbs lean organic ground beef
1/2 cup finely diced onion
2/3 cup homemade bread crumbs (see recipe below or use your favorite store-bought)
1 to 2 teaspoons dried basil
1 to 2 teaspoons garlic powder
2 generous pinches of kosher salt (about 1 teaspoon)
1 teaspoon ground black pepper (or more to taste)

Recipe

Preheat oven to 375℉. In a large mixing bowl, lightly beat the eggs. Add the rest of the ingredients to the bowl and mix, folding in the ingredients with both hands until completely combined. Place meatloaf mixture into bread pan (8.5 x 4.5 x 2.5) and bake for 40 minutes. During the last 5 minutes, spread ketchup to cover the top and finish baking. Let cool 5 minutes. Cut thick slices and serve with mashed red potatoes. Leftovers are great for meatloaf sandwiches!

Homemade Breadcrumbs

Place 4 to 6 slices of wheat bread directly on middle rack in a 200° oven for 20 minutes (or so) until dry but not browning. Let the bread cool on the rack. Using a food processor: First break up dried slices of bread then place into processor and pulse until bread crumbs form. Add seasonings to the crumbs in the food processor: about one teaspoon each of salt and pepper and two teaspoons of dried oregano, and pulse briefly to mix.

South African Carrot Soup

A South African Specialty

Following two wonderful weeks of Indian Summer, the first days of Fall have reached Petaluma, California. Today I made one of my favorite soup recipes: South African Carrot Soup.

ElephantI joined family and friends on a quest to build a sister-school project in South Africa when my children were in middle school and high school. During many visits, I discovered their lovely cuisine as I shared meals with the equally lovely people I met. South Africa is known as the rainbow nation because of the amazing diversity of its people. This beautiful diversity is reflected in their music, art, culture and food. I experienced the fusion of African, European and Asian cooking come together in flavorful and healthy meals during a stay at the Ghost Mountain Inn. The inn is family owned and run, and is near several nature preserves — I fell in love with the nearby Hluhluwe-Imfolozi Park’s elephant herd.

The following recipe is a favorite for many reasons: It is simple, healthy, yummy, and reminds me of my heart’s connection to a special place on the planet. If you like butternut squash soup, this is a great recipe for you, and the carrots are much easier to peel and dice!

Ingredients:
2 tablespoons olive oil
12 medium, or 7/8 large, carrots peeled and roughly diced
1 small yellow onion, diced
4 cups vegetable or chicken broth (plus 1/4 to 1/2 cup if needed later)
3 to 4 spoonfuls of unsalted peanut butter (almond and cashew butter also work)
1/4 to 1/2 teaspoon yellow curry (or more if you like it spicy)
1/2 teaspoon orange zest (just the orange part of the peel, not the white part)
pinch of salt
fresh ground pepper to tasteCarrot Soup Ingredients

Recipe:
Saute diced onion and carrots in olive oil with a pinch or two of salt for 4 to 5 minutes, or until they just begin to get golden (this brings out the sugars). Add broth and bring to a simmer for 7 to 10 minutes, until just cooked — don’t overcook the carrots. Let the soup cool down so that you can safely puree it in a blender or food processor. Return the puree to the soup pot, and add a little more broth if it is too thick for your liking. Bring to a simmer then add peanut butter (or other nut butter), yellow curry, orange zest and pepper to taste and simmer 5 to 10 minutes.

BerKelly’s Garden Zucchini Parmesan

We don’t have an upscale kitchen (a relic of 1979), and the ingredients we cook with are simple – but we have purpose in our little kitchen and we are cookin’ this summer. Do you like the scrumptious yumminess of Eggplant Parmesan? This dish is similar, but BETTER, and made with, the season’s most prolific queen of vegetables, zucchini. We made this nutritious, crunchy, cheesy, layered, vegetarian dish with an enormous zucchini from the Anton Zucchini plant in our vegetable garden built this spring with help from family members and from our church family at Unitarian Universalists of Petaluma (podcast to follow soon).

The recipe has its own history, coming from our favorite hardbound cookbook, My Nepenthe: Bohemian Tales of Food, Family, and Big Sur. With Berkley’s roasted tomato, garlic, and basil sauce, this dish reached its full potential; however, feel free to use what works for you – a jar of your favorite tomato sauce will do just fine.

Recipe

Ingredients:

TOMATO SAUCE
1 tablespoon olive oil
2 cloves garlic, finely chopped
1 14-oz can plum tomatoes with juice
1 sprig fresh rosemary
1 tablespoon water
Salt and freshly ground pepper

5 medium (or one GIANT) zucchini
Salt (we use Kosher salt) and pepper to taste
4 tablespoons olive oil
1 onion (we use red onion in this dish), halved then sliced thinly
2 teaspoons chopped fresh thyme (or 1 teaspoon dried thyme)
1/3 cup homemade fresh bread crumbs (we added about ½ teaspoon dried basil and ½ teaspoon kosher salt to 4 pieces of lightly toasted bread ground in the food processor, but you can use or your favorite ready-made brand).
1 tablespoon chopped fresh parsley
¾ cup grated Parmesan cheese

Preheat oven to 375F.

For the tomato sauce, heat the olive oil in a skillet over medium-high heat. Add the garlic, whole tomatoes with juice, and sprig of rosemary. Gently crush the tomatoes with the back of a wooden spoon. Swirl the water in the can to pick up the last of the tomato juices and add to the pan. Decrease the heat and gently simmer for 15 to 20 minutes, until thick and jamlike. Season to taste with salt and pepper (we add a sprinkle of chili flakes). Discard the rosemary sprig. This sauce can be made 4 days in advance or frozen and used later.

Trim the zucchini (at the ends) and slice lengthwise into 4 or 5 ribbons each. (If using a GIANT zucchini, cut in half first, then slice lengthwise.) Season with salt and pepper. Heat 2 tablespoons olive oil in a large skillet or cast-iron pan (we used a cast-iron skillet). Add the zucchini, in batches, and fry until browned on both sides. Transfer to a paper towel-lined plate to soak up some of the oil (we placed it directly into our baking dish). Cut each piece in half, crosswise (we didn’t need to do this).

In a separate skillet (we used the same cast-iron skillet for everything), heat 1 tablespoon olive oil over medium heat. Add the onion and thyme and cook, stirring occasionally, until translucent and just beginning to brown, about 10 minutes. Season with salt; transfer to a small bowl (we just added the onions on top of the zucchini in the baking dish).

In the same skillet, heat 2 tablespoons olive oil over low heat. Stir in the bread crumbs and cook until golden, 2 to 3 minutes. Remove from heat and stir in the parsley.

Arrange the zucchini in a 2 quart baking dish (we doubled the recipe and used two baking dishes), overlapping the slices to make one dense layer. Top with the onion mixture and cover with the tomato sauce. Sprinkle with the cheese, then with the bread crumbs. Cover tightly with aluminum foil. Bake until bubbling, about 45 minutes (we baked for 25 minutes). Remove the foil and bake for 5 to 10 minutes longer, until golden brown on top.

This dish tastes as good as it smells when it’s baking!

Simply Delicious Bread Pudding

A Recipe from Kelly’s Family:  Simply Delicious Bread Pudding


Simply Delicious Bread Pudding

Recipes that are passed down from generation to generation are gems to be treasured. Many of these recipes have stories connected to their tasty preparations. Berkley and I like to hear these stories as much as we like to eat the home-made results, and we’ve decided to document them whenever possible.  Below is my maternal great-grandmother’s recipe for bread pudding and a story that will be forever linked to it.

During last year’s family reunion, my niece Samantha and I recorded an oral history interview with my grandmother that focused on her life during the Great Depression. Part of my grandmother’s story is about the family table, and the good food my great-grandmother prepared to sustain her five children and the children who became part of their extended family.

As an oral history practitioner, I’ve been honored to hear and document how history was lived from WWII veterans and survivors, farmers and ranchers, civil rights activists, and Apartheid protestors. Interviewing my grandmother was a joy. Below is a video with historic photographs, narrated with the recording of my grandmother’s interview.

Ingredients for Simply Delicious Bread Pudding

2 ¼ cups whole milk

2 eggs (room temperature) slightly beaten

½ cup brown sugar (measure by firmly packing)

½ teaspoon cinnamon

1 teaspoon vanilla

¼ teaspoon salt

½ cup dried currants (or raisins)

About 2 tablespoons unsalted butter

2 heaping cups day-old bread cubes:

I recommend cutting 1 inch cubes then setting the cubes out on a cookie sheet or cooling rack over night. If you don’t have time to do this ahead, no worries. Your bread pudding will still be fabulous. We like using Hawaiian or Challah bread, however a good French loaf works very well.

Boiling water

Directions:

Preheat oven to 350°. Butter an 8-inch baking dish, bottom and sides. Using a whisk, combine milk and eggs in large mixing bowl.  To the milk mixture, add brown sugar, cinnamon, vanilla and salt until thoroughly combined. With a spatula or large spoon, gently mix in the cubed bread and currants (or raisins) and let sit for about 10 minutes. Spoon bread pudding mixture into the buttered baking dish, and dot the top with small pieces of butter. Set the baking dish inside a larger baking dish and then place that on the middle rack of your preheated oven. Slowly add hot/boiling water to the larger baking dish until it reaches a third-of-the-way to half-way up the sides of the bread pudding baking dish.  This helps the bread pudding to cook evenly and give it a silky smooth texture. Bake for 40 to 45 minutes, or until a knife inserted in the center comes out clean. Serve warm or cooled, topped with freshly made whipped cream.

Turning Japanese

My kids told me that this year we will be making sushi. They did it through their birthday gifts. Zoë gave me some beautiful Japanese bowls. Zach was a little more direct; he gave me a book on how to make sushi. Neither one knew of the others gift, giving us all a laugh. My Mom followed up with tempura recipes in a cookbook she gifted to Kelly for Christmas. We found a nice rice cooker (a very important part of sushi making) at the local kitchen discount store and found a tempura cooker for $10 at another local discount store. Next step: send out  invitations,  roll up your sleeves and be fearless.

Check out our recipe links above. Don’t be intimidated, sushi is surprisingly simple.
Let us know if you have questions or suggestions and Be Fearless!

« Older entries